

How To Install A Bolt-In Roll Cage
Roll cage installation guide, bolt-in cages
Customers often ask us how to fit a bolt-in cage, and many of the answers online are a paragraph long. This page follows the cage makers' own fitting sheets, the Motorsport UK and FIA rule text, and what owners and fitters report from real builds, with the sources named so you can check them.
We supply cages and we do not fit them, so this is what the makers' instructions and the rules say, in the order the work goes. Your own cage's instructions always come first. If you would rather hand the job over, our fitting cost guide covers what a fitter charges, and the weld-in side has its own guide: how to install a weld-in roll cage.
- Bolt-in means the cage bolts together and bolts down, but the plates under the feet are usually still welded to the shell
- Motorsport UK and FIA rules ask for at least 3 bolts per foot, M8 grade 8.8 minimum, onto a steel plate at least 3 mm thick and 120 cm² welded to the shell
- Torque with hand tools only: Safety Devices say never use air or electric nut guns
- Never fit a cage over carpet or underfelt, and never drill or weld the cage itself
- First-time fitters should plan a weekend, and a shop fits a bolt-in with welded feet in 9 to 16 hours according to our fitting cost guide
What is on this page
What bolt-in means in practice
A bolt-in cage has tubes that bolt together and feet that bolt down, which is why it can come out of the car again. It does not mean nothing gets welded. Safety Devices say in their bolt-in instructions that most of their cages need reinforcement plates welded to the floor, Custom Cages say welding is needed only for the footplates, and JP Cages sell their bolt-in competition cage with weld-in mounts that go onto the shell once.
That matches the rule text. Motorsport UK’s National Competition Regulations (Chapter 7, Appendix 3) and the FIA’s Article 253-8 both ask for the same mounting: every foot on at least three bolts, onto a steel plate welded to the bodyshell. Neither rule book uses the words bolt-in or weld-in as classes, so the label comes from the trade, and it covers four different jobs.
1 Existing factory points
The cage bolts to seat belt and seat mounts already in the car. SW Motorsports Club Sport half cages work this way, with no drilling and no welding.
2 Drilled floor and spreader plates
Holes go through the floor and plates sandwich the panel. SW bolt-in half cages and some JP half cages do this, and spreader plates can optionally be welded.
3 Welded plates or feet
Plates are welded to the shell and the cage bolts to them. This is the competition version, and Safety Devices, OMP, Sparco, Custom Cages and SW full bolt-in MSUK cages all fall here.
4 Unassembled DIY kit
Straight or bent tubes you assemble yourself, with bolt-in or weld-in options. JP and SW DIY half cage kits are this type.
i
Read the listing before you order
Brand titles do not settle it. Our OMP and Sparco listings say the feet brackets are welded on, and Custom Cages bolt-in kits say welding is only for the footplates. If a listing is unclear, ask us before you order.
3 per foot
bolts for each rollbar foot, M8 grade 8.8 at minimum
3 mm
minimum plate thickness, and at least the wall thickness of the tube
120 cm²
minimum plate area under a main, front or lateral rollbar foot
60 cm²
minimum plate area under a backstay
Rules: Motorsport UK NCR Chapter 7 Appendix 3 (2025 text read in full, 2026 figures checked on the online edition) and FIA Appendix J Article 253-8 (2020 text). Our roll cage rules guide has the tube sizes and the rest of the rule detail.
✓1 Cage tube rising from the foot
✓2 Mounting foot on the cage, bolted down
✓3 Reinforcement plate, at least 3 mm thick and 120 cm², welded to the shell
✓4 Floor or sill panel the plate is welded to
✓5 Bolts, at least three per foot, M8 grade 8.8 minimum
✓6 Weld nuts or nuts and washers that hold the bolts
Who does the job
The makers do not agree on this, so here are their positions side by side. We are a retailer and we do not fit cages, so we can point you to the right kind of help, and we are happy to talk through your car first.
| Maker | What they say about fitting a bolt-in | What that means in practice |
|---|---|---|
| Safety Devices | Generic instructions for all their bolt-in cages, with an assistant for the rear cage. No nut guns, no drilling the cage, no welding it. | Follow the sheet step by step, welded plates included. We recommend a professional fitter for any Safety Devices cage. |
| Custom Cages | Bolt-in is easier because you do not need to be a skilled welder, and welding is needed only for the footplates. Certification of a cage fitted by someone else uses a weld test and two videos. | Plan the footplate welding and the certification route before you start. |
| JP Cages | Strongly recommend professional fitting for competition use. Bolt-in competition cages come with weld-in mounts, and half cages are track-day cages, not competition cages. | Ask which of their cages suit your event, and have the mounts welded properly. |
| SW Motorsports | Half cages are described as easy to fit at home with a basic tool set, and full bolt-in MSUK cages have weld-in foot plates and need the dash cut. | Half cage at home is realistic, a full cage is a different job. |
One thing all four agree on is that welding plates to a shell is a skill. If you cannot do it well, pay someone who does it regularly, and ask them for what is needed for the paperwork. Custom Cages run a fitting service at their Daventry site for any cage they make, and our bolt-in or weld-in guide explains which Custom Cages kits are which.
Before you order or start
Most fitting problems are decided before the cage arrives. These are the checks we would run first, and they come from the maker sheets and from owners who found out the hard way.
✓Check the shell is sound where the feet land: Safety Devices say not to fit to a car with significant rust at the mounting areas, or a car that is distorted from an accident
✓Check for a factory sliding sunroof: SW and OMP do not suit these, and one owner reports needing the roof cut and re-skinned
✓Choose the seat before the cage, and test it in the car with a helmet on, because a cage fitted first has caught people out on headroom. See our cage and seat frame guide
✓Check what the event or club asks for: some series name a cage design, some ask for a welded cage, and some do not say
✓Decide what the paperwork needs: homologated, certified, or a build to the rule spec. Our rules guide explains the terms
✓Read the maker instructions for your exact cage before you strip anything, because the order of work matters
✓Check the cage against the layout drawing or tube checklist on delivery, and photograph any damage before you cut the packaging apart
✓If it is a used cage, check the plates, the identification plate and the paperwork match it, because an altered cage can lose its homologation
We cannot confirm availability, timing or paperwork from this page, and our cage availability and production times guide explains how we check the exact kit before you book a fitter.
Preparing the car
Stripping the interior is the main preparation for a bolt-in, and it is the part owners underestimate. Our cost guide has a first-time strip at four to six hours.
Take out
Front and rear seats, carpets and underfelt where the cage stands, seat belts and trim where the rear cage passes the B pillars, sun visors, interior mirror and, on some cages, headlining and dash trim. Photograph as you go and bag the fixings by area.
Make safe
Disconnect the battery, which also keeps airbag units from firing, and empty the fuel system and remove the tank if you will weld near it. Safety Devices give this as their instruction, and some owners report a second person with an extinguisher instead, which is not the maker position.
Protect
Lay cardboard or a fire blanket over glass, trim and the floor you are not working on, and keep a water spray and an extinguisher to hand, because underseal burns.
✓Remove paint and seam sealer where a plate will be welded, so the earth and weld are on bare metal
✓Tie wiring looms away from the area before you weld
✓Check underneath for fuel lines, brake pipes and wiring before you drill
✓Mark every removed fixing in a labelled bag so the interior goes back together
✓Never lay the cage or a plate over carpet or underfelt: it must sit on the body
The order of work
This is the Safety Devices bolt-in sequence, which is the most complete public one, with extra detail from owner builds and fabricator notes. Other makers’ sheets differ in the details, so treat their sheet as the master for your cage.
1
Read everything first, then check the parts
The order of work matters. Check the parts against the layout drawing or tube checklist before you cut or drill anything.
2
Strip the car and make it safe
Interior out as above, battery disconnected, fuel system emptied or the tank removed if you are welding.
3
Test fit the rear cage
Two people lift it in. Stand the hoop upright with the backstays rearward and the removable diagonal fitted. If it is tight past the B pillars, a strap round the bottom of the backstays pulls them together to get through, then release it. Removing the door and the steering wheel can help.
4
Test fit the front cage, never assemble it outside the car
Offer one front leg through the door to the hoop bracket with bolts holding it, fit the screen rail, then the other leg. If that is awkward, assemble the legs to the top rail inside the car.
5
Fit the door bars loosely
They set the spacing between front and rear cages, and they are fitted loose at this stage.
6
Tighten the joints with the cage still loose in the car
Torque the joints to the sheet figures so the geometry is set, then centralise the cage so the clearance is even left and right and front and back.
7
Position the plates, rear first
Plates without weld nuts sit inside the car under each foot with full contact and no gaps. Mark through the foot holes and drill, usually 11 mm. For plates with weld nuts over hollow sections, mark through the holes, move the cage away and cut 25 mm holes so the nuts sit in the void.
8
Trim or bend universal plates to fit
Vice, grinder and file. Box type plates may need the lower edge trimmed for hoop height on older cars. Plate thickness changes hoop height, so re-check roof and trim clearance.
9
Bolt the plates up and repeat for the front
Use the kit hardware. On a front cage, do not tack anything until both cages are positioned.
10
Tack the plates to the shell
Three or four tacks on each plate, with the cage bolted down and not moving. This is the step that stops the plates shifting when you take the cage out.
11
Unbolt and remove the whole cage, then weld the plates
Fully weld the plates and any multipoint fixings, clean the spatter and burnt paint, then zinc-rich primer and topcoat. Safety Devices powder coat is satin black.
12
Refit, floor bolts first
Refit the cage loosely, tighten the floor bolts first and then the joint bolts. Fit the seats and trim, cut the carpet around the plates and never lay it over them.
Source: Safety Devices bolt-in and multipoint fitting instructions, with the C1 Racing Club and Mark Fish notes for owner detail. Some fabricators tack and weld in one go rather than removing the cage, and Custom Cages' self-fit route asks for a tack-in video before final welding on cages that need welding.
Plates, drilling and bolts
The plates are the part of a bolt-in that carries the load, so they get their own section. The rules fix the minimum numbers and the makers add their own preferences.
11 mm
usual hole size for plates without weld nuts, from the Safety Devices sheet
25 mm
hole size for weld-nut plates over hollow sections, so the nuts sit in the void
3 or 4 tacks
on each plate before the cage comes out
40 mm
minimum stitch weld length Safety Devices give for welding to the body
Inside or outside the floor?
Safety Devices put the reinforcing plates inside the car for competition. Their sheet allows plain external backing plates for road-only cages, with the nuts inside the car. Forums disagree, so follow your maker and your event rules.
Do the bolts need to be M8?
M8 grade 8.8 is the rule minimum per foot. Makers supply their own hardware, often M10, and you should use what comes with your cage and not mix in other fixings.
Can I drill the cage?
No. Safety Devices say drilling, welding, repositioning or enlarging holes in the cage releases them from responsibility and voids the homologation. Slipper tubes are the exception and are drilled only after everything else is tight.
✓Check underneath for fuel lines, brake pipes and wiring before every hole
✓Centre punch from inside and drill from underneath, or drill from inside, so the cage does not have to come out again for marking
✓Deburr every hole and clear swarf from sill cavities with a magnet on a stick
✓Prime and paint every cut and drilled area, and seal holes against water
✓Use weld-through primer on plate backs and floor if you plan to weld close up
✓If a front mount is missing a plate along its front edge, expect it to be questioned: one owner reports a failure at a road rally scrutineering
Torque and fixings
No cage maker publishes one master torque table for every cage. These are Safety Devices’ published figures for their bolt-in cages. Their own documents disagree on two of them, which we show, so check the sheet in your box.
| Fixing | Safety Devices figure | Where it appears |
|---|---|---|
| M10 saddle bracket bolts | 30 Nm | Bolt-in and multipoint instructions, 2025 general guidelines |
| M10 slipper tube bolts | 45 Nm in the bolt-in and multipoint sheets, 40 Nm in the 2025 general guidelines | Sheets disagree, so use the one with your cage |
| M10 lap joint bolts | 60 Nm with Loctite 243 in the bolt-in sheet, 45 Nm in the multipoint sheet, 30 Nm in the 2025 general guidelines | Sheets disagree, so use the one with your cage |
| Cage-to-floor bolts | 45 Nm, with thread lock and flat and spring washers on weld-nut or captive-nut plates | Bolt-in instructions |
| Universal door bar fixings | M10 at 45 Nm, M12 at 70 Nm | Door bar fitting instructions |
| Universal dash bar | M8 at 25.5 Nm | Dash bar fitting instructions |
✓Hand tools only: Safety Devices say under no circumstances use air or electric nut guns
✓Tighten the floor bolts first and the joint bolts second
✓Use a flat washer and a spring washer when the plate has a plain nut or captive nut
✓Nyloc nuts should show at least two full threads and are single use
✓Copper grease on the lap joint shoulder, not the thread, and thread lock on the threads
✓Never use a pry bar on a lap joint: align the halves, a G-clamp is allowed, and start every bolt loosely before tightening any
Source: Safety Devices bolt-in, multipoint, door bar and dash bar fitting instructions and the 2025 general fitting guidelines. Custom Cages say their cages are torqued to their specification without giving the figures on the page, and we found no published figures from JP or SW.
Door bars, harness bars and padding
Door bars on bolt-in cages are normally fitted loose at the test fit to set the front and rear spacing, and tightened with the rest. Under the Motorsport UK rules the side protection must be as high as possible and not higher than half the height of the door aperture. Safety Devices door bars are removable so the doors still work normally.
Harness bars have two accepted ways to take the belts: loop the strap round the bar, or bolt it to an insert welded into the bar. Our harness fitting guide and Custom Cages harness mounting guide cover the angles, the 3 bar slide and the insert fixings, and our TRS wrap guide shows the wrap on a real belt. Check the harness angles before the final bolts go in, because moving a bar afterwards is a cage modification.
FIA events
Padding to FIA standard 8857-2001 Type A is compulsory on the tubes where the body or helmet could touch, fixed so it cannot move.
Motorsport UK national events
Padding is recommended, and tubes within 150 mm of a helmet should be covered with energy-absorbing material. FIA homologated padding is suitable.
Foam lagging
It is not FIA padding. One owner saved about £40 by using it and a competition cage needs approved padding.
We list Safety Devices Roll Cage Padding at £42.00 and Door Bar Padding at £35.40.
Checks after fitting
✓Re-torque the bolts after the first few drives and after track days, as SW and Safety Devices both advise
✓Sit in the final seat position with your helmet on and check the clearance to the hoop, using the figure your cage maker and event rules give, because we found conflicting figures online
✓Check belt operation and the clearance between each belt anchor and the cage upright: one owner leaves about 5 mm so belts can be fitted without removing the cage
✓Check the doors, windows, glovebox and mirror still work, and that nothing rattles against the headlining
✓Check the equal gap on both sides of each saddle bracket and that no tab touches
✓Keep the certificate or homologation paperwork with the car, with the identification plate matching it
✓Do not drill, weld or modify a homologated cage afterwards, because the FIA and the makers treat that as voiding it, and the Motorsport UK rules list only a few additions
✓Clean and touch up the paint, and keep the threads clean so removal stays possible
Time and cost
Time depends on the cage type, whether you strip the car, and whether the plates need welding. These figures come from our roll cage fitting cost guide and owner reports, which we name so you can weigh them.
| Job | Time | Source |
|---|---|---|
| Half cage on existing mounting points | 1 to 3 hours | Our fitting cost guide |
| Rear half cage with plates welded, stripped car, by a fitter | 4 to 5 hours | A fitter on ClioSport, 2020 |
| Rear bolt-in half cage in a shop | 3 to 6 hours | Our fitting cost guide |
| Full multipoint bolt-in in a shop | 6 to 10 hours | Our fitting cost guide |
| Bolt-in with welded feet in a shop | 9 to 16 hours | Our fitting cost guide |
| First-time interior strip | 4 to 6 hours | Our own bolt-in vs weld-in guide |
| Full multipoint bolt-in, first timer at home | A weekend | Our fitting cost guide |
£40 to £75
an hour plus VAT is what fitters publish, with premium shops at £80 to £100
2 people
to lift the rear cage in, according to Safety Devices, C1 Racing and Mark Fish
Weeks
busy fitters can book out, so plan the date before the cage arrives
Plate welding itself takes minutes. What takes the time is assembling the cage in the car, marking, taking it out, welding, and refitting, and many owners do that more than once.
Common mistakes
Treating bolt-in as no welding
Competition cages need the plates welded to the shell, and unwelded plates are a reported scrutineering problem.
Thin plates and cheap bolts
Owners report nearly using 1 to 1.5 mm plates, and wheel bolts and coach bolts being criticised. Use the kit hardware and plates at least 3 mm.
Fitting over carpet
The cage must sit on the body, and carpet is cut around the plates.
Nut guns and pry bars
Hand tools only, and never lever a lap joint apart.
Drilling or welding the cage
It voids the homologation and releases the maker from responsibility.
Welding with the tank in
Underseal catches fire, and Safety Devices tell you to drain the system and remove the tank.
Choosing the seat after the cage
Low or tall seats change the helmet gap and the harness angle, and a seat that will not pass the hoop is an expensive surprise.
Not checking the bolts again
Check after the first drives and after track days.
Which way we would go
Garreth: If the cage is for a track car and I can do the strip myself, I would do the strip, the test fit and the plate marking at home, and pay a welder for the plates only.
Cameron: I would take the whole job to a fabricator who fits cages every week. The plates are the part where a bad weld gives no warning, and a competition car needs the paperwork to match.
Garreth: That is fair for a competition car. For a half cage on a track day car I would still do most of it at home.
Cameron: And on a half cage that uses the car’s own mounting points, I would agree and keep it at home too.
Garreth: So the answer depends on the cage type and what the car is for.
Cameron: Which is why we ask what the car does before we say bolt-in or weld-in.
Bolt-in cages in customers' cars
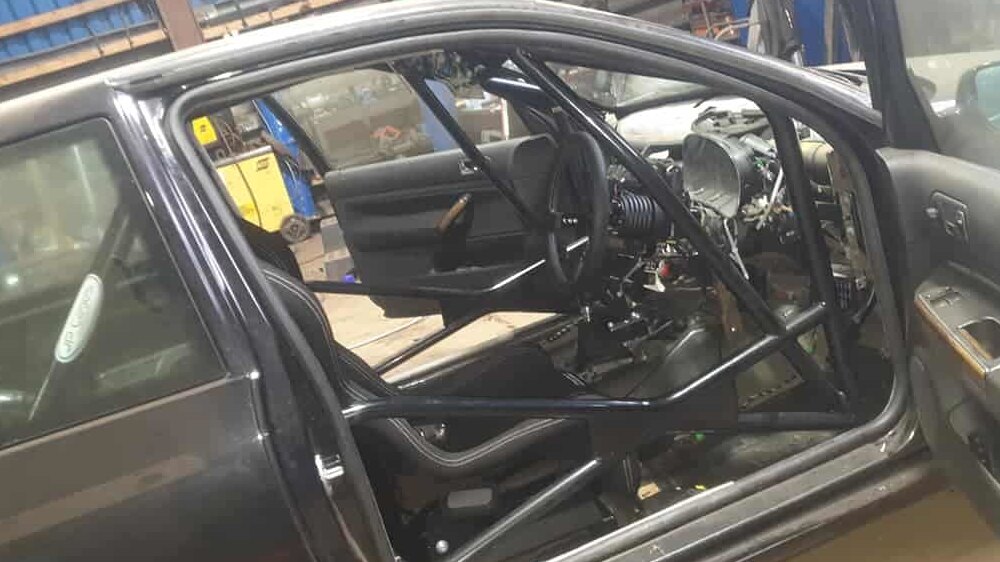
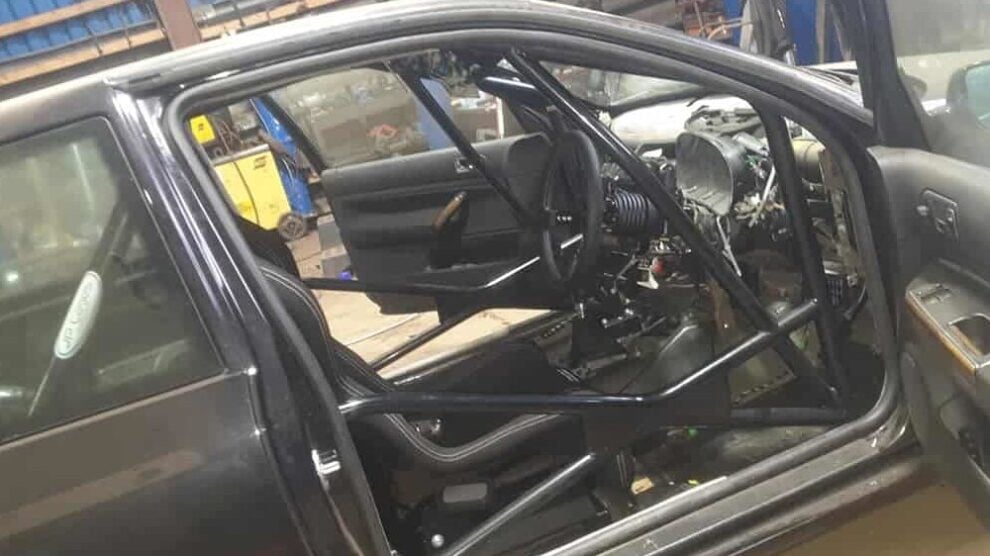
A black JP Cages bolt-in multipoint cage with door bars in a stripped VW Golf MK4
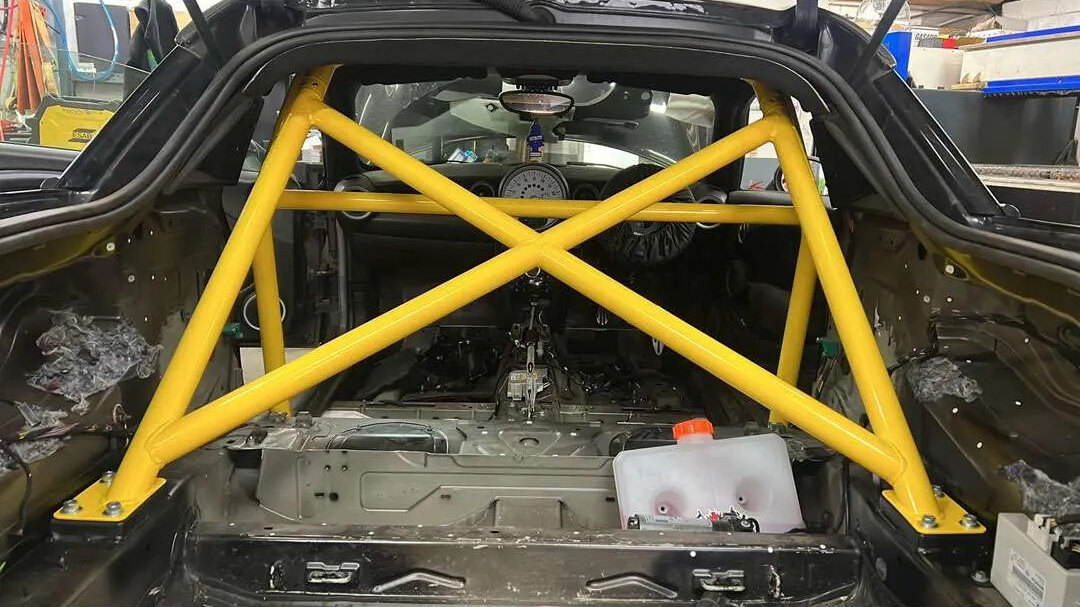
A yellow SW Motorsports bolt-in half cage with cross bracing in the back of a stripped Mini
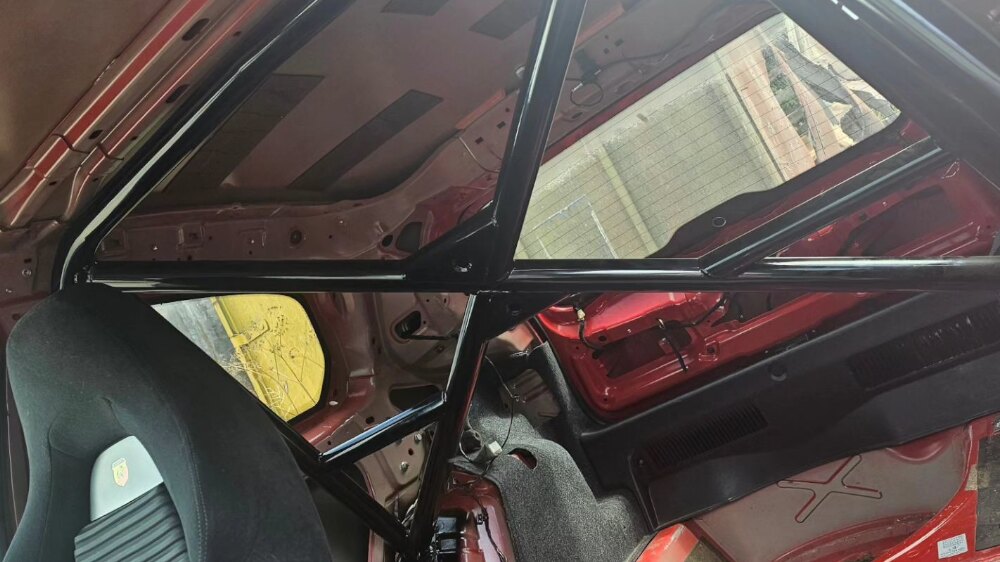
A black JP Cages half cage fitted behind the front seats of a stripped red Fiat Punto Mk3
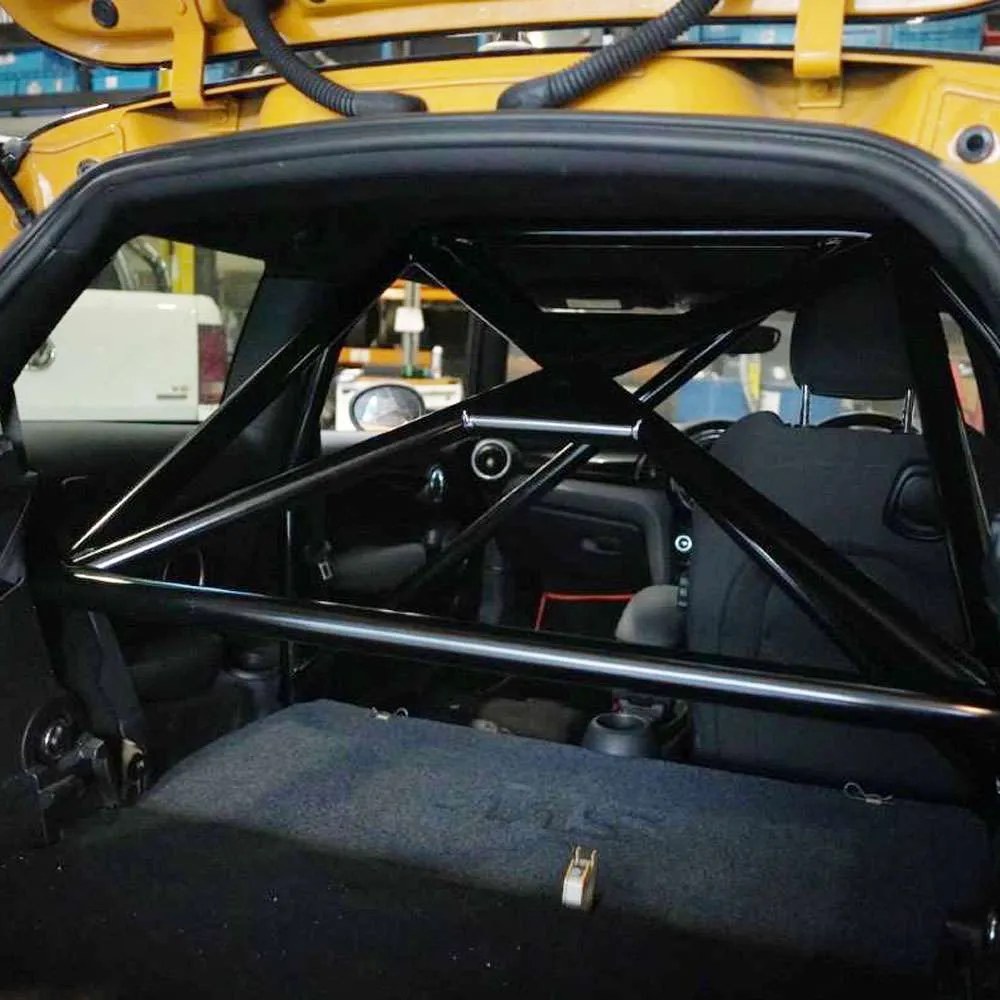
A SW Motorsports bolt-in half cage in a Mini F56
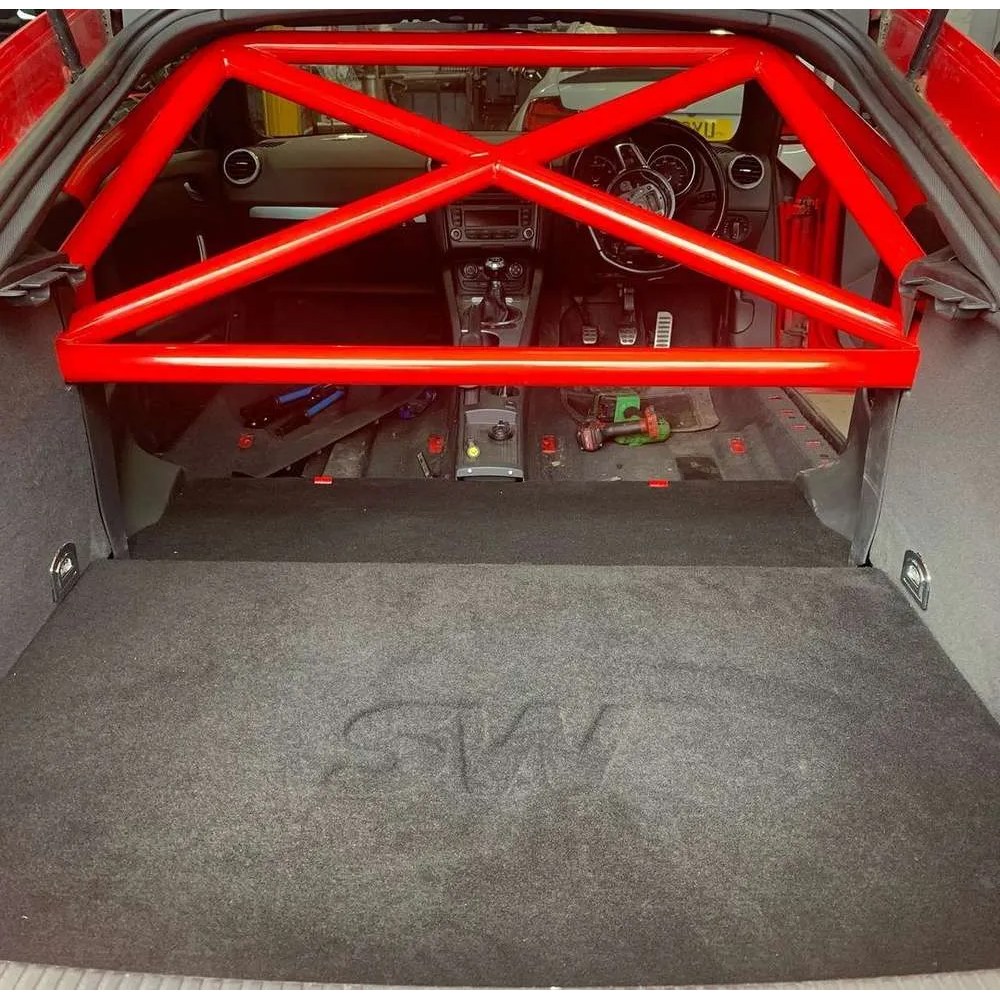
A SW Motorsports bolt-in half cage in an Audi TT Mk2
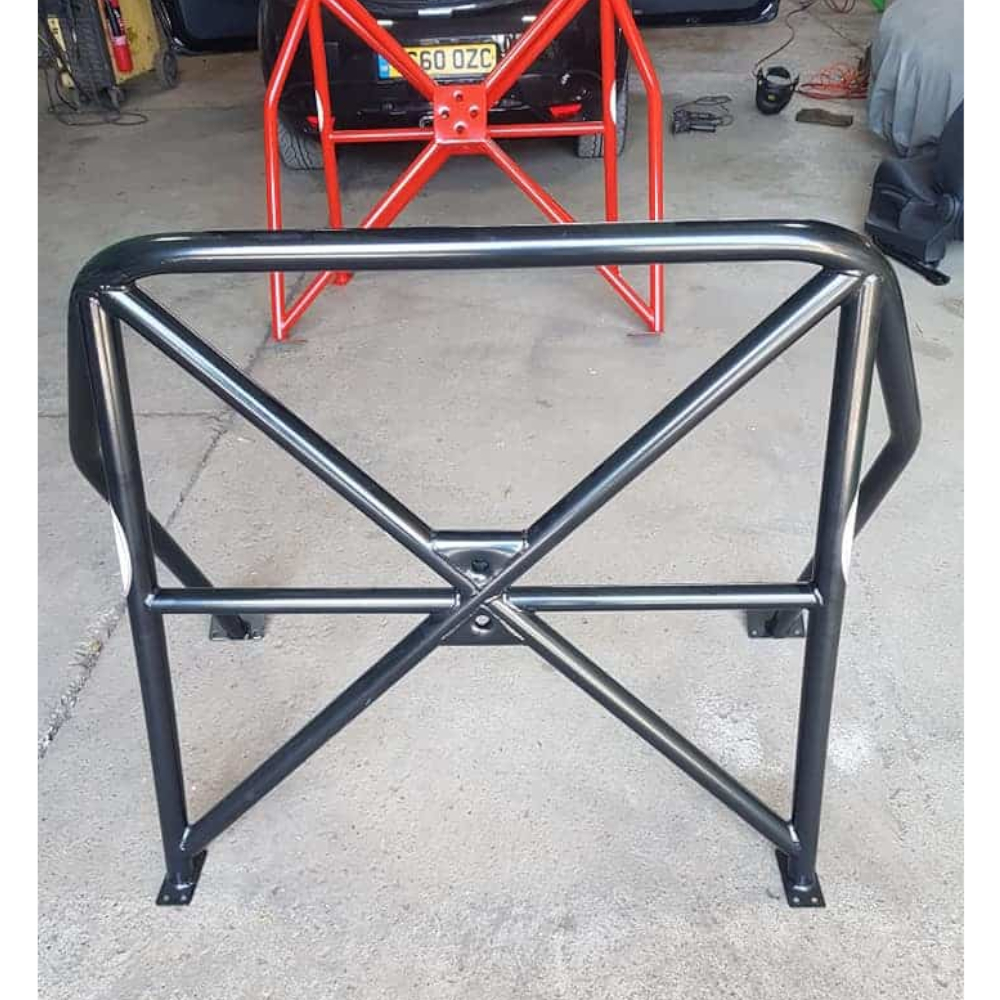
A JP Cages half cage in a stripped Peugeot 106 MK2 interior
Bolt-in cages we list
Live prices, inc VAT. Ask us to confirm the fitting type, the approval and what is in the box for your exact car, because bolt-in covers the four jobs above.
 Custom Cages BMW E36 2dr Bolt-In CDS Roll Cage - Race & Rally Kit£1704.30 inc VAT
 Custom Cages Mitsubishi Lancer EVO 3 and 4 Bolt-in CDS Roll Cage Kit£1311.00 inc VAT
 Custom Cages BMW E92 Rear Half Bolt-in T45 Roll Cage Kit£1020.30 inc VAT
 Safety Devices BMW E36 Compact Bolt-in Roll Cage Single Door BarFrom £958.80 inc VAT
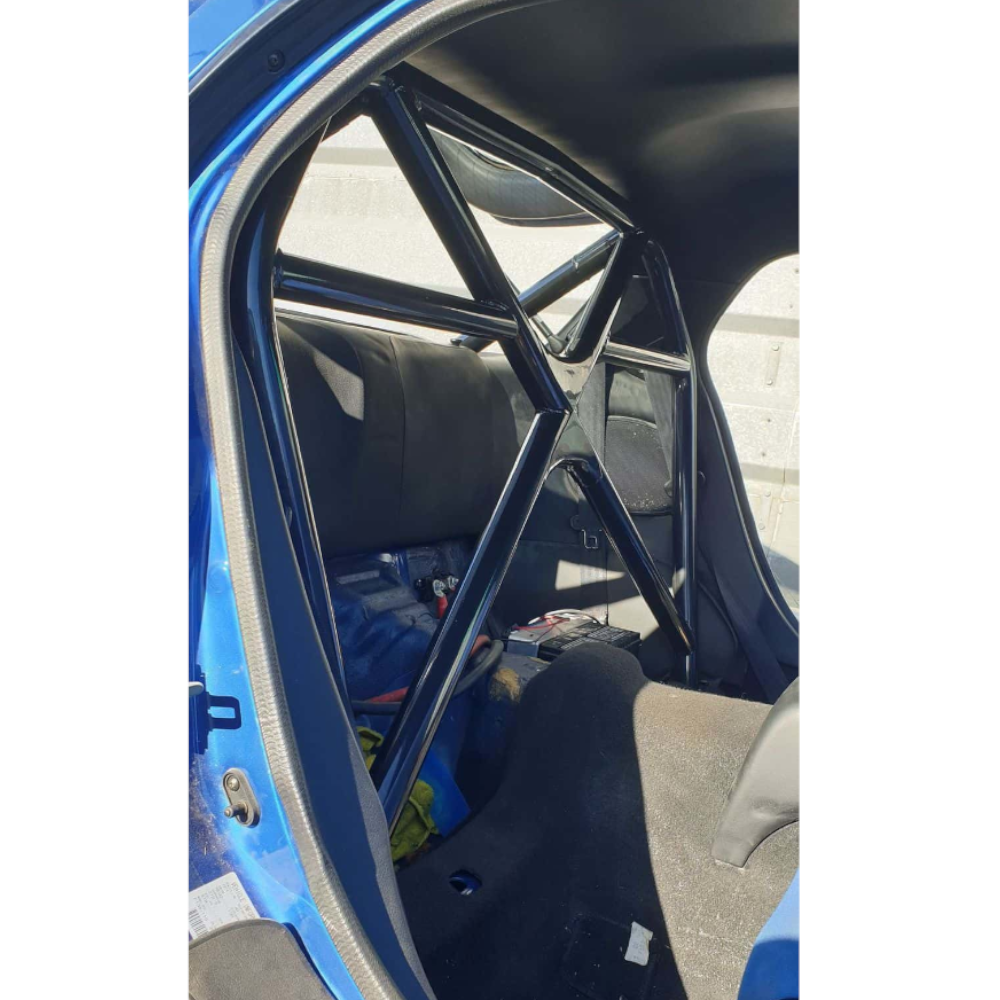 JP Mazda RX-7 FD Clubsport Half CageFrom £817.80 inc VAT
 JP Cages Mini R55 DIY Half Cage KitFrom £354.74 inc VAT
 SW Motorsports Audi A3/S3 8P Half Roll Cage KitFrom £383.96 inc VAT
 OMP Mazda MX-5 NB (1998-2005) Bolt In Roll Cage£661.06 inc VAT
The full range is in our roll cage category, and our SW Motorsports install guide, track car installation guide and Safety Devices TR4 walk-through show cages being fitted to specific cars.
Questions about installing a bolt-in roll cage
Does a bolt-in roll cage need welding?
Usually the plates do. Motorsport UK and FIA rules ask for the feet to bolt to a steel plate at least 3 mm thick and 120 cm2 welded to the shell. Custom Cages say welding is needed only for the footplates, and Safety Devices say most of their cages need plates welded to the floor. Half cages that use the car’s own mounting points need no welding.
Can I fit a bolt-in roll cage myself?
Parts of it, yes. The strip, test fit and bolt-up suit a competent home mechanic, and SW call their half cages easy to fit at home. The plate welding is a welder’s job, and JP strongly recommend a professional fit for competition use.
How long does it take?
A half cage on existing points is one to three hours. A full multipoint bolt-in is six to ten hours in a shop, and nine to sixteen with welded feet. First-time fitters should plan a weekend.
What tools do I need?
Socket and ring spanners, a torque wrench, drill with step bits and a hole saw, trim tools, ratchet straps, jack stands, thread lock, primer and paint, and PPE. You also need a welder and fire kit for plates. Safety Devices say hand tools only for torquing.
Do I have to take the interior out?
The maker sheets list seats, carpets, underfelt, seat belts and trim where the cage stands, and headlining on some cages. Custom Cages assess bolt-in strip-out car by car, and they charge £40 an hour for items they have to remove.
Which bolts and what torque?
Use the fixings supplied with your cage. The rules ask for at least three M8 grade 8.8 bolts per foot, and Safety Devices give 30 Nm for M10 saddle bolts and 45 Nm for floor bolts, with other figures varying by sheet.
Can I drill or weld the cage?
No. Drilling, welding or repositioning a homologated cage voids the homologation, and Motorsport UK allows only a short list of additions such as door bars and harness bars.
Will it pass scrutineering?
That depends on the cage, the paperwork and the event. The cage needs to match its certificate, the plates need to meet the rule sizes, and the event may add its own rules, so ask your scrutineer.
Can I move a bolt-in cage to another car?
Safety Devices say a bolt-in can be transferred to the same model. A homologated cage is certified for a specific car, so check before moving one.
Tell us about your car
Come and talk it through with Garreth and Cameron, or ring us on 0115 647 8650. Give us the car, what it does, the event or club rules, and whether the interior is already out. We will tell you which cage type fits, what is in the box, and where a fitter comes into it.
Need a personal recommendation?
We're here to ensure you pick the right seat.
Contact us today.