 Hundreds Of Products Ready Today. Dispatch/Collection
 Customer Question: How Do I Fit the Seat Belt Clip That Comes With My Sparco Seat Frame?
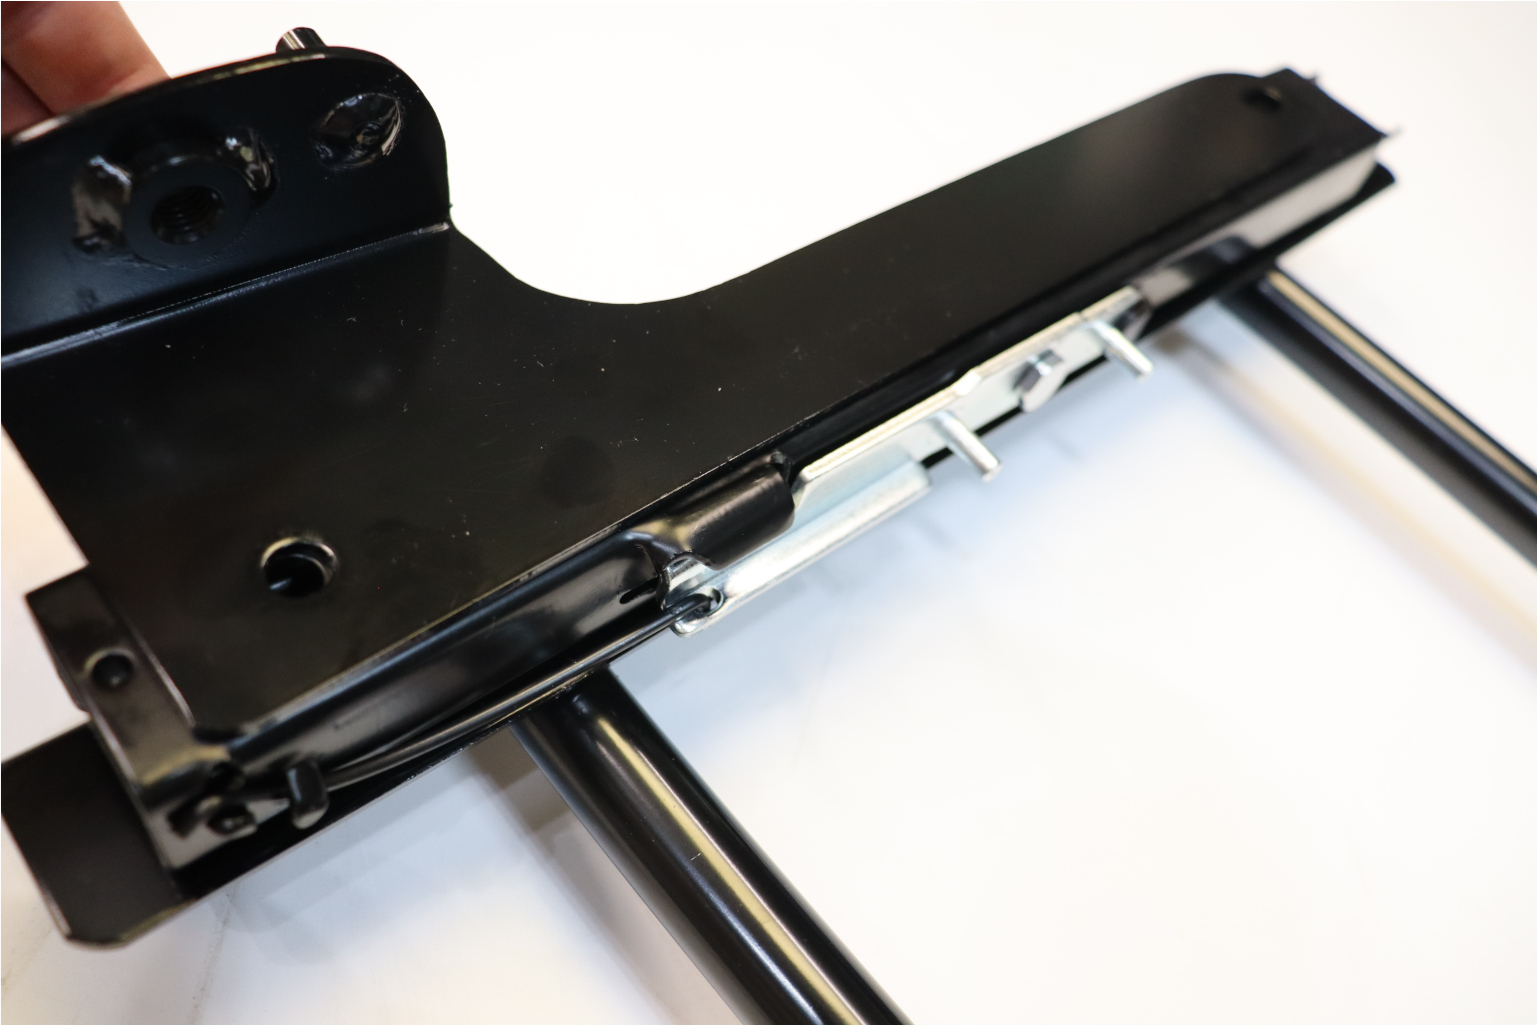
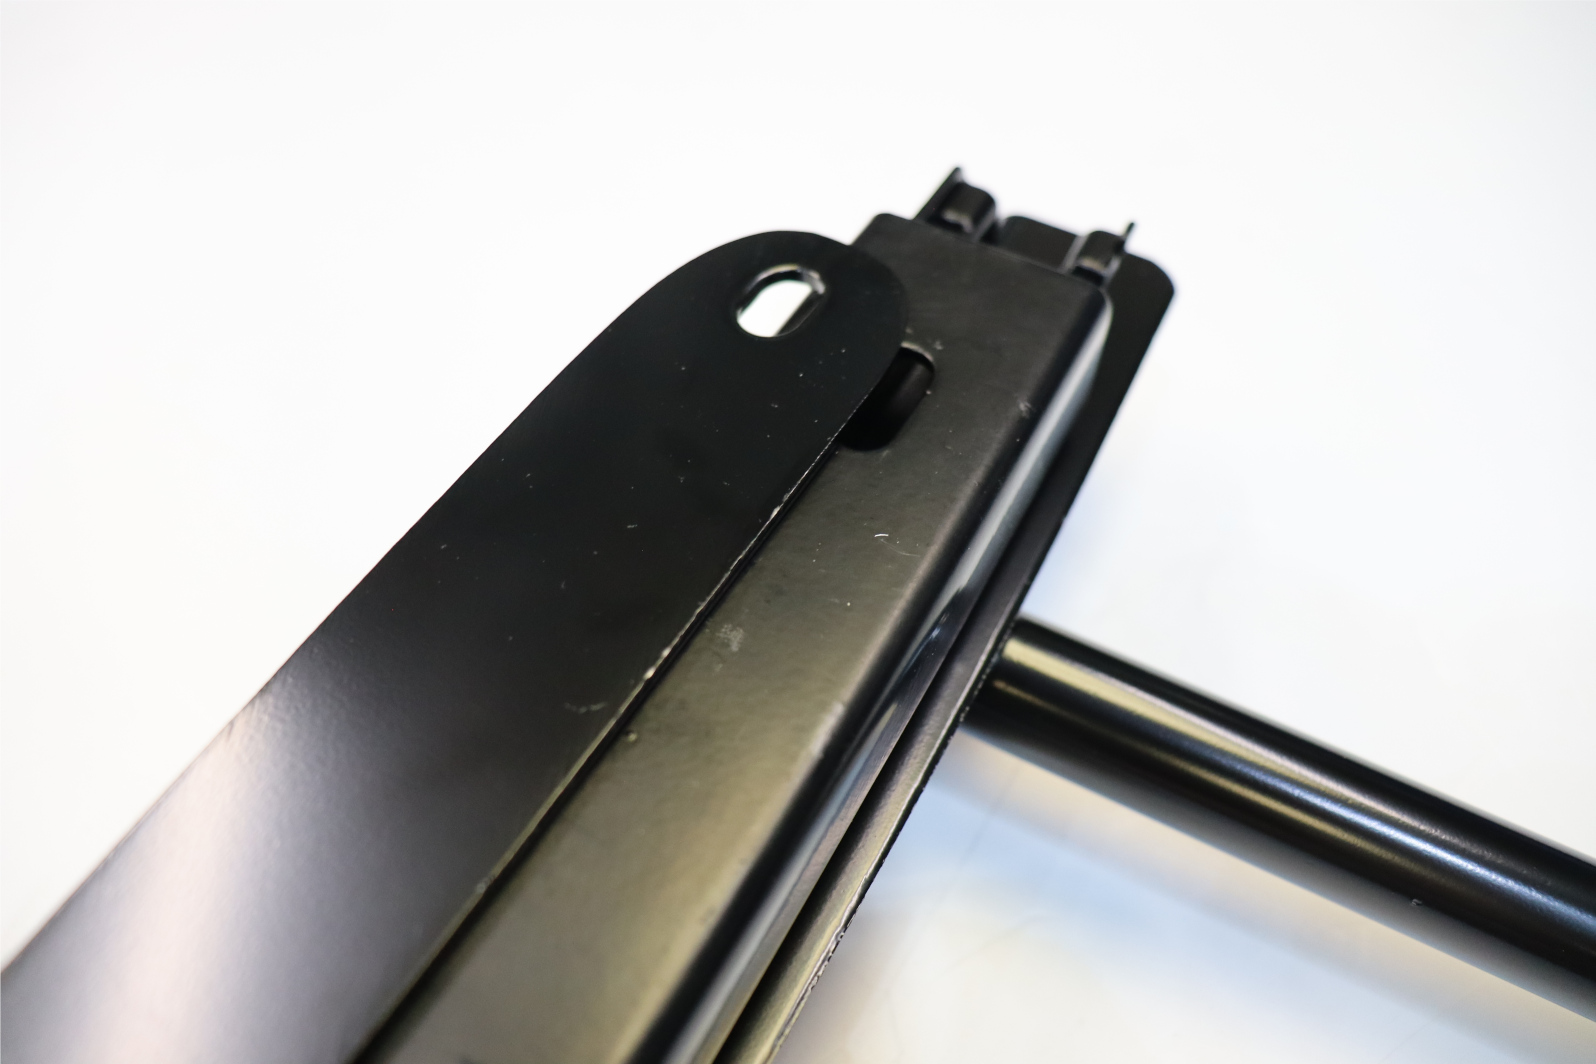
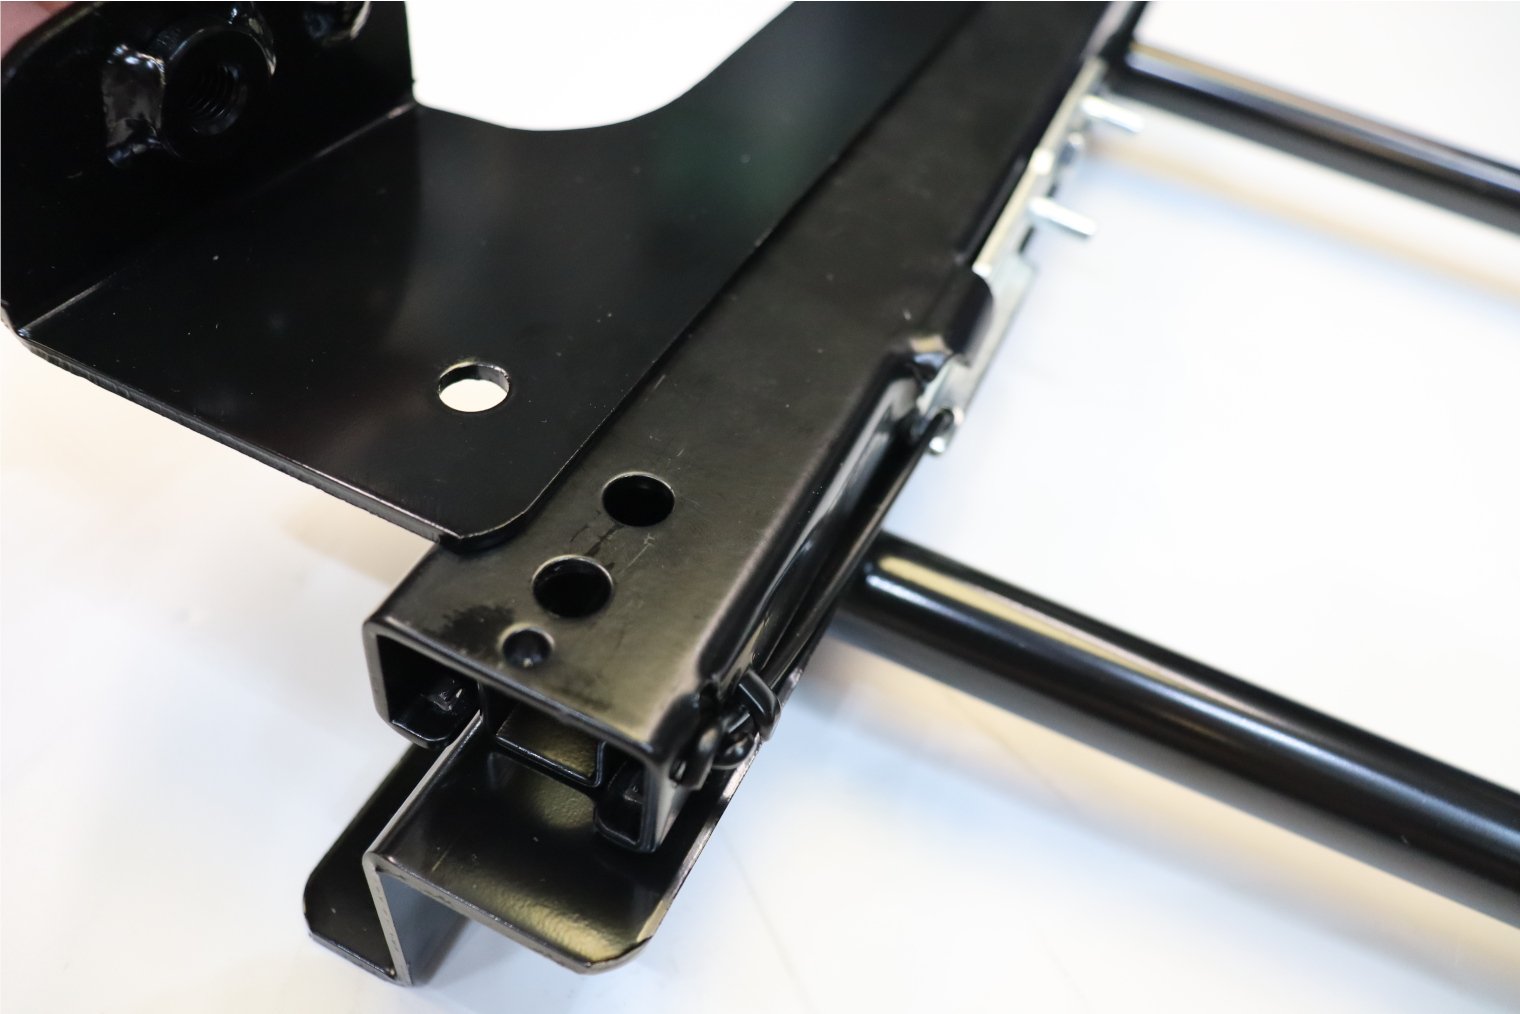
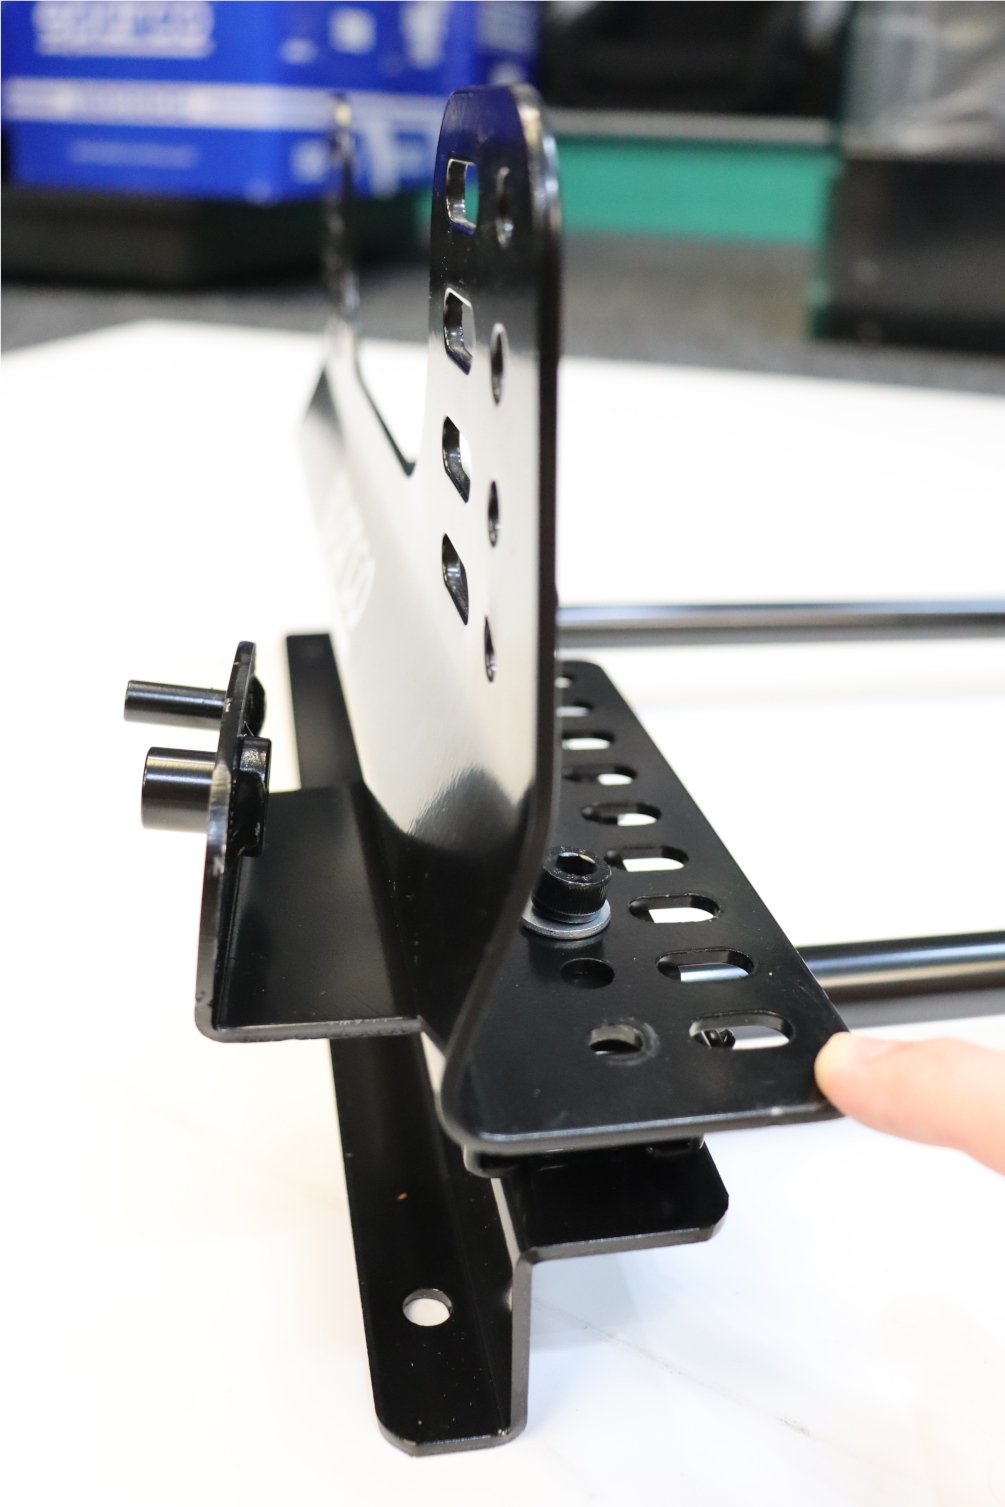
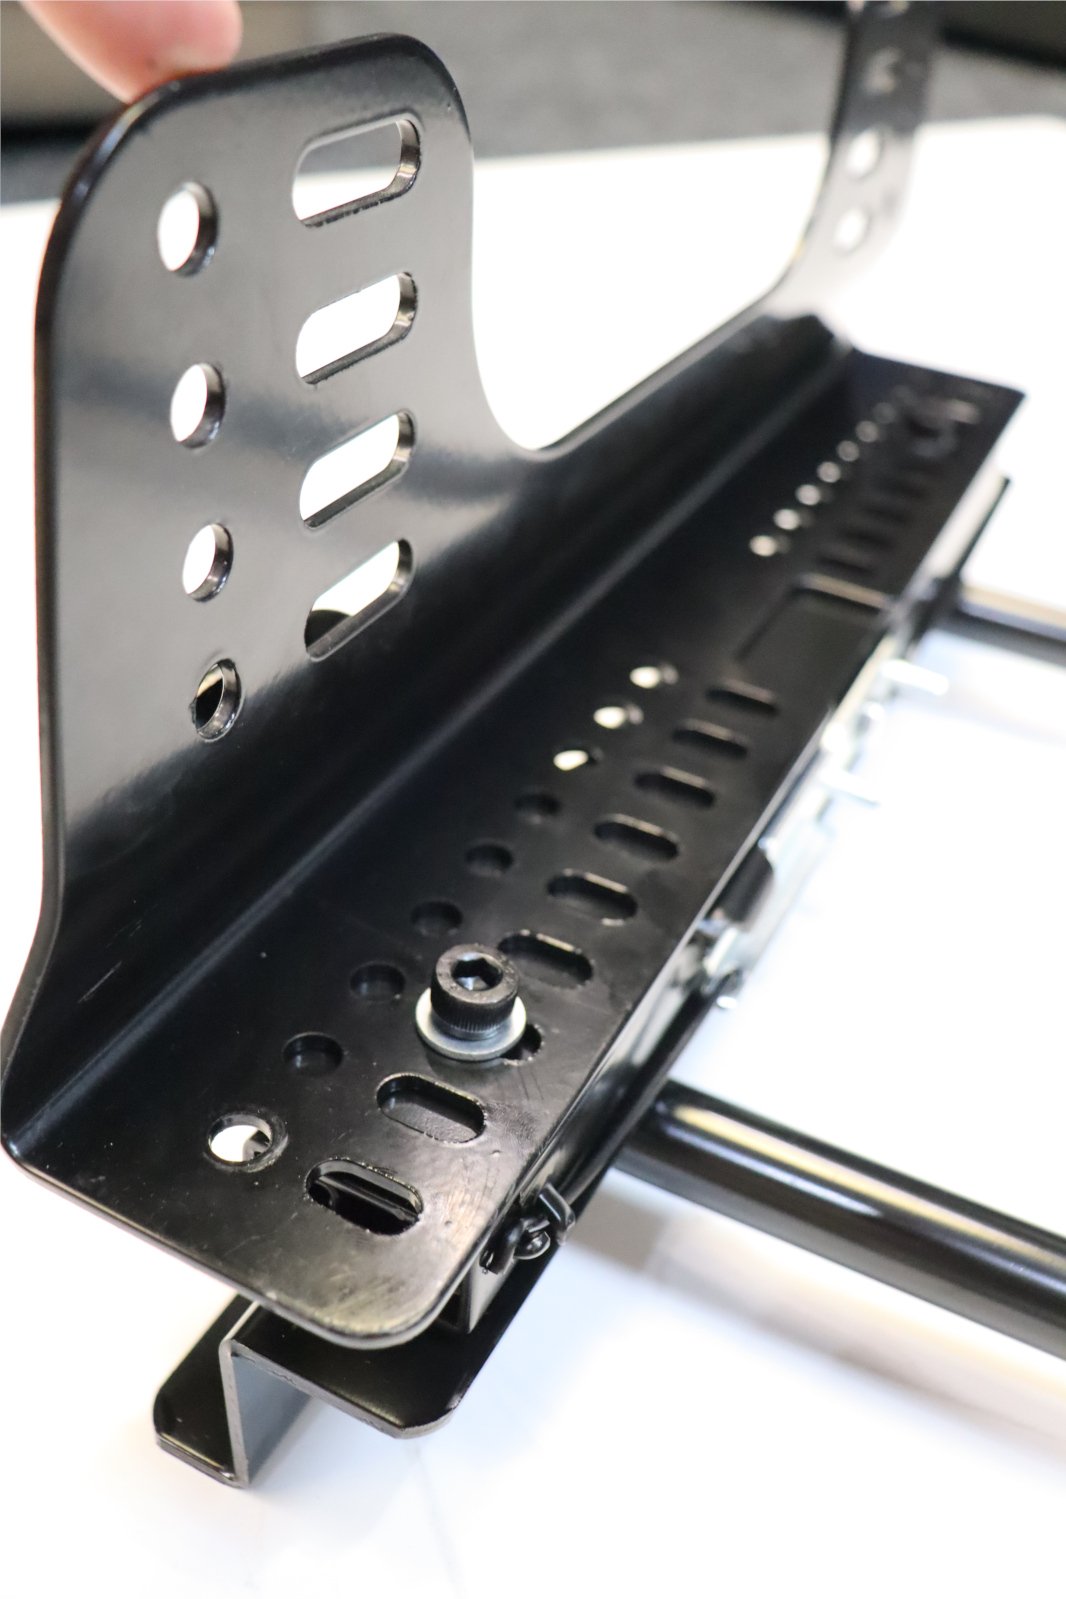
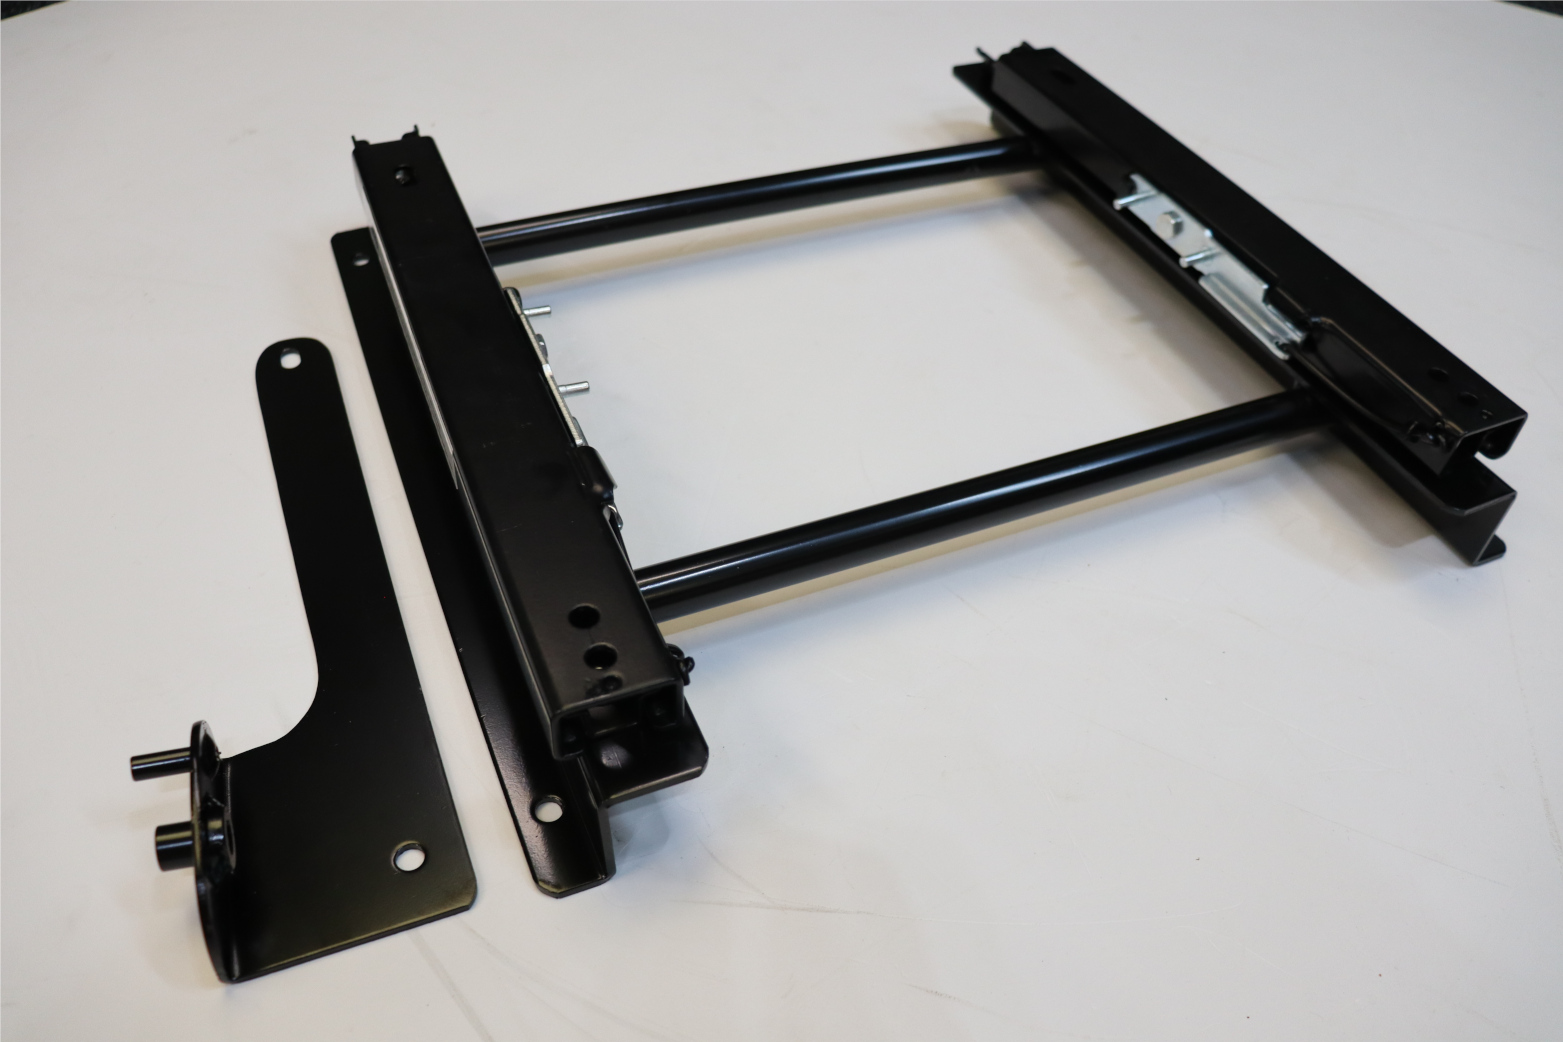
When fitting a set of Sparco seats with a Sparco sub-frame, many customers are puzzled by the extra bracket included in the box. It’s flat, flared, and has two bolt holes, but it doesn’t quite line up with anything on the main sub-frame itself. So what is it for? That part is Sparco’s dedicated seat belt mount bracket, and it’s a really useful (and important) bit of hardware when you’re using your factory seat belts with aftermarket seats. This bracket allows your original seat belt buckle receiver to remain firmly attached to the seat assembly, meaning it moves with the seat and stays properly positioned on your hip no matter where the seat is adjusted. Without it, the belt receiver would stay fixed to the floor, which can cause discomfort or even safety issues when sliding the seat forward or backward.
This clever piece of hardware is designed to bolt between the sliding runner and the seat (for base-mounted seats) or between the sliding runner and side mounts (for side-mounted bucket seats). That’s why its holes don’t line up with the sub-frame directly. It’s built to sit in line with universal sliding runners that have the standard 345mm bolt spacing, allowing your seat belt mount to stay in sync with the seat as it moves. The result is a smoother, more comfortable fit for road use and ensures that your seat belt works properly every time, something that’s especially important if you’re keeping your car road legal or going through an MOT or IVA test. It’s a small detail, but it makes a big difference in how professional and practical your installation feels.
What Is the Sparco Seat Belt Mount?
Sparco includes a separate steel bracket with most of their vehicle-specific sub-frames. This is designed to hold your original factory seat belt receiver and safely integrate it into your aftermarket seat setup. The bracket has a unique flared-out design that:
- Clears the sub-frame and any seat above it
- Aligns with the bolt holes on your universal sliding runners (345mm wide spacing)
- Keeps your seat belt receiver anchored relative to your seat’s position
This clever bit of engineering ensures your seat belt stays in the correct place, no matter how far forward or backward you move your seat. If this bracket isn’t attached on top of a sliding runner, your factory seat belt receiver might end up too close, too far, or worse, unusable. We recommend using a sliding runner at all times when using a seat belt mount for safety. Fixed setups where sliding runners are not present should be designed for full motorsport or track day use with a racing harness and not a factory seat belt.
Why Doesn’t It Line Up With the Sub-Frame Bolt Holes?
Good question. The bracket isn’t supposed to line up with the sub-frame bolt holes. It’s designed to bolt between the seat and the slider, or between the side mounts and the slider, depending on your setup. This keeps your seat belt receiver locked in place relative to the seat, so it moves with you when the seat slides, keeping it in the right position across your lap and body.
This is especially important for safety. Without this, your belt might tighten as you slide the seat forward or loosen too much when you slide it back, both of which are unsafe. If this bracket isn’t attached on top of a sliding runner, your factory seat belt receiver might end up too close, too far, or worse, unusable. We recommend using a sliding runner at all times when using a seat belt mount for safety. Fixed setups where sliding runners are not present should be designed for full motorsport or track day use with a racing harness and not a factory seat belt.
Where Does It Go in the Stack?
Here’s how your installation stack should look:
For Base-Mounted Reclining Seats:
- Sub-frame
- Sliding runners
- Seat belt mount (between the seat and the runner)
- Base-mounted seat
For Side-Mounted Bucket Seats:
- Sub-frame
- Sliding runners
- Seat belt mount
- Side mounts
- Side-mounted seat
This sequence keeps everything aligned and safe.
Will It Work With My Side Mounts?
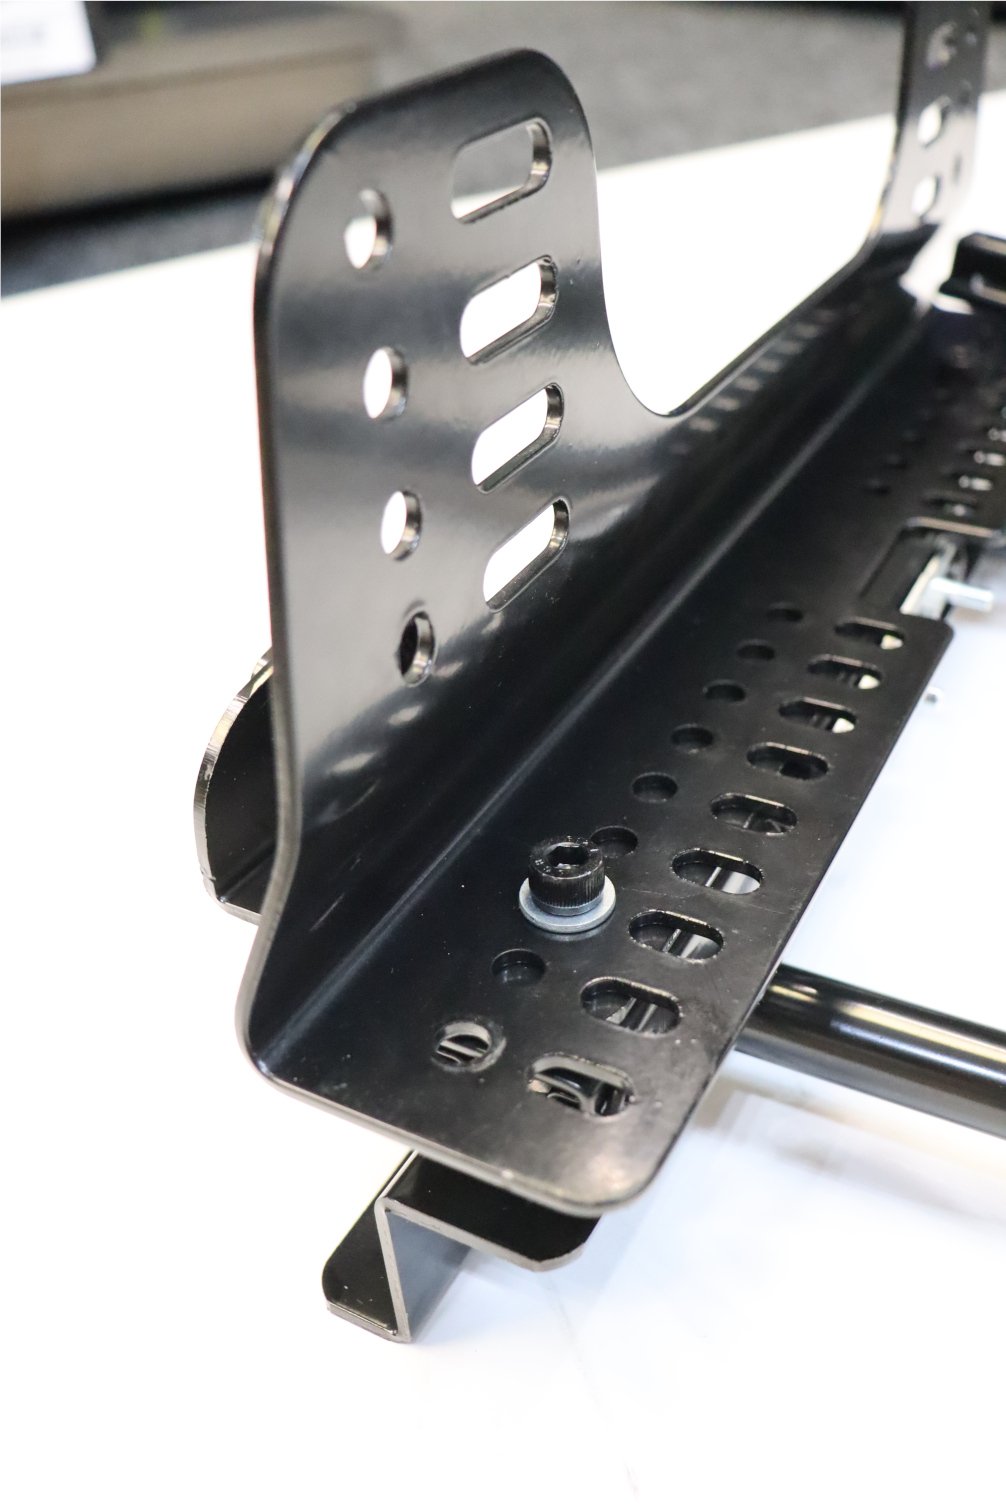
Yes, it will. The Sparco seat belt bracket is flared wide enough to clear even the largest side mounts. For example, Sparco’s steel multi-point side mounts or our Endurance Motorsport universal brackets can be used with no clearance issues. Whether your mounts use a narrow or wide mounting pattern, the seat belt bracket has the space to accommodate it.
Just note: the seat belt bracket is a few millimeters thick, so it will raise one side of the frame slightly. Sparco doesn’t supply a spacer to compensate for this, but you can use bolt washers or one of our universal seat mount spacers to balance both sides evenly.
Which Sliding Runners Are Compatible?
The bolt holes in the seat belt mount are designed to work with universal sliding runners, and most importantly, the 345mm width bolt pattern used by most runners on the market. As long as your runners match the 345mm width of the Sparco sub-frame, you’re good to go.
We always recommend sticking to matching brands for the cleanest fit, Sparco sliders with Sparco sub-frames, but OMP and Endurance Motorsport sliding runners with a 345mm bolt pattern will also work fine.
Thread Mismatch: MINI R56 Seat Belt Bolt vs Sparco R56 Subframe Bracket
Thread Specifications of the Components
Sparco Bracket’s Welded Nut: Our example Sparco frame is specifically for a Mini R56, compatible with the factory floor bolt points in that vehicle. The Sparco direct-fit subframe for the MINI R56 comes with a welded nut intended for the seat belt buckle (pretensioner) mounting. This nut is threaded in an imperial fine thread size – specifically 7/16″-20 UNF (7/16 inch diameter, 20 TPI). This size is a common standard for seat belt and harness hardware in many vehicles and aftermarket kits. Sparco likely chose 7/16-20 to accommodate standard harness eyebolts, as most racing harnesses use 7/16″ UNF anchor bolts by default.
OEM MINI R56 Seat Belt Tensioner Bolt: The factory bolt that secures the seat belt receiver/ pretensioner to the OEM seat is a metric Torx bolt. According to BMW/MINI parts documentation, it is an M10 x 22mm bolt (10 mm diameter, ~22 mm length). This is presumed to be the standard M10 coarse thread (1.5 mm pitch) unless otherwise specified. In other words, the MINI’s OEM tensioner bolt is a 10 mm metric bolt, not an imperial size.
There is a clear metric-imperial incompatibility between the two components. The Sparco’s welded nut (7/16″-20 UNF) and the MINI’s bolt (M10) are close in size but not the same:
Diameter: A 7/16″ bolt is about 11.11 mm. The MINI’s M10 bolt is 10.0 mm. So the M10 bolt is too small for the 7/16″-20 nut and will just spin without catching.
Trying a 7/16″ bolt in an M10 nut won’t work either—it’s too big to even start.Thread Pitch/Form: 7/16″-20 UNF uses 20 threads per inch (≈1.27 mm pitch), while M10×1.5 has a 1.5 mm pitch. Even if the diameters were close, the threads don’t match in shape or spacing. This isn’t a minor mismatch—it’s a totally different threading standard.
Typical symptom: The OEM M10 bolt won’t thread into the Sparco nut. It either won’t start or just spins freely. It’s not defective—just the wrong thread type.
Solutions and Workarounds
MINI owners and installers have solved this in a few ways:
1. Use a 7/16″-20 UNF Bolt (Recommended)
- The simplest fix is to use the correct imperial bolt.
- Get a high-strength 7/16″-20 UNF bolt (Grade 8 / ISO 10.9 or better) of the right length.
- Common in motorsport seatbelt kits.
- A bolt around 25–30 mm thread length typically works well.
- Use a washer and threadlocker or locking nut for safety.
2. Re-Tap the Bracket to M10
- Drill out the 7/16″ threads and re-cut M10×1.5 threads so the OEM bolt can be reused.
- This reduces thread strength slightly. Using a hardened M10 helicoil insert can help restore strength.
- Only do this if you have the tools and skill, as poor thread cutting can weaken the mount.
3. Replace the Nut or Use a Through-Bolt
- Remove or bypass the welded 7/16″ nut entirely.
- Either drill it out and use a matching nut and bolt, or weld in a new M10 nut.
- Less common since it requires cutting and welding—most people just swap the bolt instead.
Best Practice Recommendation
Use a 7/16″-20 UNF high-strength bolt.
This matches the Sparco bracket and avoids modifying the frame. Just make sure the bolt length accounts for any extra bracket thickness and use a washer or threadlocker to keep it secure.
Some MINI R56 owners have used 7/16-20 seatbelt bolts from motorsport suppliers. These are designed to fit standard anchor points and work well in this setup. Look for bolts marked “Grade 8”, “10.9”, or “12.9” for safety.
Optional: All-Metric Setup
If you really want to keep everything metric, you can re-tap the nut to M10 and use a longer Class 10.9 M10 bolt. This works fine if done correctly, but it’s more work and carries some risk. In most cases, it’s easier and safer to just use a proper 7/16″-20 bolt.
Why Use a Seat Belt Mount at All?
For many of our customers, daily driving is just as important as track use. So being able to retain your original 3-point seat belts is a big deal. Here’s why this bracket is essential:
- Legal Compliance: Most road cars still need working factory belts for MOT or IVA testing.
- Convenience: Even if you install a racing harness, many drivers prefer using factory belts for everyday driving.
- Adaptability: Swapping between harnesses and belts becomes easier with this bracket in place.
Step-by-Step Installation Summary
Let’s make this easy:
- Bolt the Sparco sub-frame to your vehicle floor using OEM bolts.
- Mount your sliding runner onto the sub-frame (345mm spacing).
- Attach the seat belt mount between the runner and seat (base-mount) or runner and side mounts (side-mount).
- Mount your seat or side brackets on top.
- Torque all bolts to the correct spec and test the slider movement to confirm the belt stays in the right position.
- Double-check that the seat belt receiver is easy to access and doesn’t bind or stretch during seat movement.
Ready to Install? Here’s What You’ll Need
We’ll be linking all the compatible components here, including:
- Sparco sub-frames
- Sparco/OMP/Endurance sliding runners
- Endurance Motorsport and Sparco side mounts
- Universal spacers
- Vehicle-specific fitting kits
If you’re not sure which items are compatible with your car or seats, our team can help build your install list.


-
From £47.99 Incl. VATFrom £39.99 Excl. VAT Select options This product has multiple variants. The options may be chosen on the product page


Final Thoughts – Keep Your Belt, Keep It Safe
If you’re using a Sparco sub-frame and want to keep your factory seat belt in place, the included seat belt mount is essential. It’s designed to work with sliding runners and a wide range of seats, offering a safe, secure, and legal way to retain your factory belt setup while upgrading your seats.
With the right fitment order and components, you’ll have a setup that works for both daily driving and track use. As always, if you need help choosing the right parts for your car, our showroom team is here to assist. Come in for a demo, check the setup in person, or send us your vehicle details and seat choice, we’ll get you sorted.